How to Build a Simple Cabinet Box in 10 Steps
Building a cabinet box can feel overwhelming, especially when you’re trying to get every measurement, cut, and joint just right. You’re not alone—many DIYers struggle with creating sturdy, square cabinets that look professional. How to Build a Simple Cabinet Box
This simple cabinet box guide breaks the process into manageable steps, from choosing materials to installing shelves, doors, hinges, and hardware. Follow each step carefully to build a reliable cabinet with confidence.
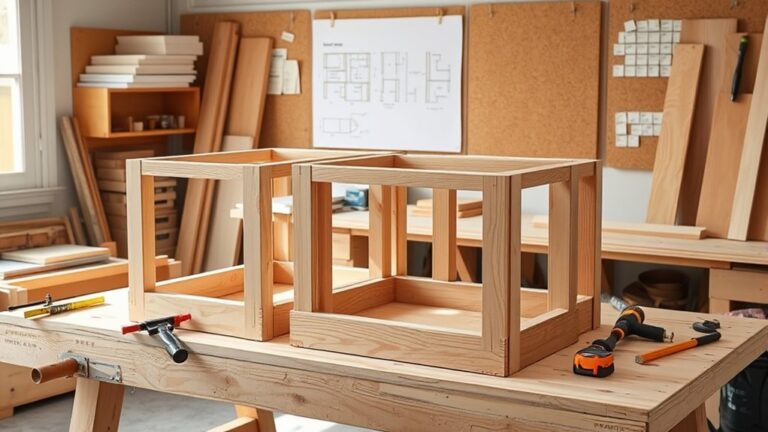
Plan your cabinet’s width, height, and depth, allowing installation clearance. Choose quality ¾-inch plywood and gather a saw, square, drill, clamps, and safety gear.
Measure, mark, and label the sides, top, bottom, shelves, and back. Cut panels accurately, then drill pocket holes and finish exposed edges.
Dry-fit and glue the box, drive screws, and check both diagonals for square. Attach the back, sand, and apply finish.
Install shelves, doors, hinges, and hardware, then examine each step in detail.
Key Takeaways
- Plan the cabinet’s dimensions, clearances, shelf layout, and material requirements based on the installation space.
- Select quality, flat plywood, then measure, mark, and label every panel while noting grain direction and finished edges.
- Cut panels accurately, drill pocket holes, prepare edge banding, and dry-fit the components before applying glue.
- Assemble the carcass with glue, pocket screws, clamps, and fixed shelves. Repeatedly check the diagonals to ensure the box stays square.
- Attach the back panel, sand and finish the box, then install shelves, doors, hinges, and hardware with proper alignment.
Plan Your Simple Cabinet Box Dimensions

Before cutting any material, decide how wide, tall, and deep you want your cabinet box to be. Measure the opening, wall, or floor area where you’ll install it, then note every obstruction, including trim, pipes, doors, and appliances. Leave enough clearance for installation and comfortable use.
> Measure your installation area carefully, account for every obstruction, and allow enough clearance for a comfortable, successful cabinet fit.
Choose dimensions that match your storage needs. Greater depth holds bulky items, while a shallower box keeps contents visible and reachable.
Divide the interior into zones for dishes, tools, clothing, or supplies, and consider shelf spacing before finalizing the height. This planning supports storage optimization without creating wasted space.
Think about cabinet aesthetics, too. Align the box with nearby cabinets, maintain consistent proportions, and decide whether its face should sit flush, project slightly, or remain recessed.
Mark your target width, height, and depth clearly. Then calculate interior dimensions by subtracting the planned panel thicknesses, shelves, and any required gaps.
Review your measurements twice before moving to the next step.
Choose Materials and Gather Your Tools
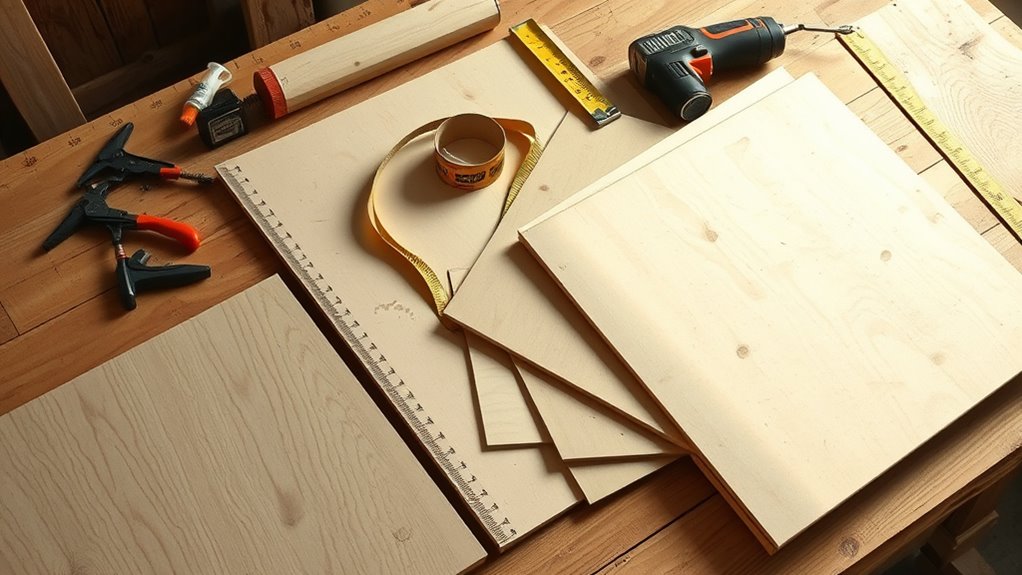
Choose quality plywood or solid wood that fits your cabinet’s purpose and desired finish. Gather the essential tools, including a tape measure, square, saw, drill, clamps, and safety gear. Before you start cutting, measure each piece carefully and double-check all your dimensions.
Select Quality Materials
Start with quality materials and the right tools to build a sturdy, professional-looking cabinet box. Choose cabinet-grade plywood or medium-density fiberboard with flat, smooth faces and consistent thickness.
Inspect every sheet for warping, swollen edges, voids, and delamination before you buy it. Material durability matters because shelves, doors, and fasteners will stress the box over time.
Select a panel thickness that suits your cabinet’s size and expected load, typically ¾-inch for the carcass. Consider solid wood for exposed edging, but match its movement characteristics to the panel material.
Plan your color selection early, especially if you’ll apply paint, stain, or laminate. Buy enough material to account for cutting waste, grain direction, and replacement pieces.
Store panels flat and protected from moisture until construction begins.
Essential Tools Checklist
Gather the essential tools before cutting any panels so the cabinet box stays accurate and efficient. Assemble a tape measure, combination square, pencil, clamps, circular saw or table saw, drill, driver bits, and a countersink bit.
Keep a sharp blade, sandpaper, and a sanding block nearby for clean edges and smooth surfaces. Use a level to check your work area and a sturdy workbench to support each panel safely.
Add wood glue, screws, and a clean rag for assembly. If you’ll install decorative hardware later, keep the appropriate screwdriver or template available.
For cabinet painting, prepare drop cloths, tack cloths, brushes, and rollers, but set them aside until construction and sanding finish.
Wear safety glasses, hearing protection, and a dust mask whenever you cut, drill, or sand.
Measure Before Cutting
Before cutting, decide whether plywood, MDF, or solid wood best suits your cabinet’s use and finish. Plywood offers strength and resists warping, MDF provides a smooth, paint-ready surface, and solid wood adds natural character but may move with humidity.
Inspect each sheet for damage, then plan your cuts to minimize waste. Take every dimension from your cabinet plan, including width, height, depth, and material thickness.
Use reliable measurement tools, such as a tape measure, combination square, straightedge, and marking knife. Check each measurement twice before marking the sheet; precise measurement prevents costly mistakes.
Keep your pencil lines thin and mark the waste side clearly. Confirm that opposite parts match, and account for saw-blade kerfs so your finished pieces fit together cleanly without surprises during assembly.
Measure and Mark the Cabinet Panels

Accurate measurements keep your cabinet box square and guarantee each panel fits properly. Set your tape measure, combination square, pencil, and straightedge on a clean work surface. Confirm the cabinet’s overall height, width, and depth from your plan, then record every dimension clearly.
Label each panel by location, such as side, top, bottom, back, or shelf, so you won’t confuse similar pieces. Mark reference faces and edges with small symbols, such as a triangle pointing toward the finished front.
Note the material thickness, grain direction, and any finished edges. These details protect cabinet aesthetics and help you interpret historical cabinet styles accurately when matching proportions or decorative conventions.
Use the square to extend measurement lines across each panel, and keep marks light but visible. Check opposing panels against one another, then compare all numbers with your plan.
Measure twice before moving on. Verify that your layout accounts for joinery, reveals, and installed hardware without cutting anything yet.
Cut the Cabinet Box Pieces
Set up your table saw or circular saw with a sharp blade, then cut each marked panel along its layout lines. Support large sheets fully so they don’t sag, shift, or pinch the blade. Keep your fingers away from the cutting path, and guide the material steadily without forcing it.
Check every cut against your cabinet plan before making the next one. Maintain consistent panel thickness orientation, and consider the Wood grain when positioning visible sides.
Label each piece immediately after cutting to prevent mix-ups.
| Piece | Cutting check |
|---|---|
| Sides | Match length and width |
| Top and bottom | Confirm identical dimensions |
| Back | Verify square corners |
After each cut, inspect the edge for tear-out or splintering. If you’re using a circular saw, clamp a straightedge as a guide for cleaner, straighter cuts.
Measure the finished pieces again, comparing opposite parts for equal dimensions. Set aside damaged or undersized pieces before assembly, and sweep away sawdust so your layout marks remain visible.
Prepare Pocket Holes and Edge Details
With the cabinet pieces cut and labeled, prepare the joinery and exposed edges before assembly. Mark pocket-hole locations on the inside faces of the sides, keeping each hole clear of shelf pins and other hardware.
Prepare labeled cabinet pieces by marking clear pocket-hole locations on their inside faces before assembly.
Use the pocket hole technique with a jig set for your material thickness, and choose a drill-bit depth that won’t break through the outer face. Clamp each panel securely, drill cleanly, and test one hole in scrap first.
Add a shallow counterbore if your jig requires it, then inspect every hole for tear-out.
Next, plan your edge detail options based on which surfaces will remain visible. Apply solid-wood edge banding to plywood edges, or use iron-on veneer for a quick finish.
Trim banding flush with a sharp block plane or edge trimmer, then sand lightly without rounding the panel. If you’ll paint the cabinet, ease sharp corners with fine sandpaper.
Keep the finished faces protected, and confirm that each piece still matches your labels and layout.
Assemble the Simple Cabinet Box
Once the joinery and edge details are ready, dry-fit the cabinet box on a flat surface to confirm that the sides, top, bottom, and shelves align correctly. Mark each piece’s position, then separate the parts for glue application.
Apply a thin, even coat of wood glue to the mating edges. Bring the sides, top, and bottom together, and drive pocket screws into the prepared holes.
Keep the edges flush as you tighten each screw, wiping away squeeze-out with a damp cloth. Add any fixed shelves the same way, checking that their front edges sit consistently with the cabinet frame.
Follow your cabinet design plans as you assemble, since shelf placement and construction details can vary among style options. If your box includes a face frame, attach it after the main carcass is assembled.
Use clamps where needed to hold joints steady while the glue sets. Let the adhesive cure according to its label before handling the box further.
Check the Box for Square
Measure both diagonals of the cabinet box and compare their lengths. If they don’t match, adjust the box until the measurements are equal and the frame is square.
Measure Diagonal Corners
To check whether your cabinet box is square, measure from one inside corner to the opposite corner, then repeat the measurement across the other diagonal. Use a tape measure, and hook it firmly into each corner without bending the blade.
Record both numbers to the nearest 1/16 inch, then compare them. Matching diagonal measurements indicate that the cabinet opening has equal corner-to-corner distances and is likely square.
If the numbers differ, the box isn’t square, so note the exact difference before proceeding. Measure along the inside edges rather than across the exterior surfaces, which can introduce errors from uneven panels or overhanging edges.
Check corner accuracy at the top, middle, and bottom if your cabinet is tall, because the frame may vary along its height.
Adjust Until Square
If the diagonal measurements don’t match, adjust the box before fastening it permanently. A crooked cabinet can cause uneven doors, difficult hinge placement, and a poor paint finish. Use this quick process:
- Loosen the clamps or screws slightly, keeping every joint supported.
- Push the longer diagonal corner inward, or pull the shorter diagonal outward, until both measurements match.
- Check the front and back edges with a square, then measure the diagonals again.
- Add temporary clamps or a scrapwood brace to hold the box steady.
When the corners read square and the edges stay flush, drive the final screws or apply glue according to your assembly plan. Recheck each diagonal immediately afterward; tightening can shift the frame.
Let the adhesive cure on a flat surface, and don’t install shelves or doors until the box remains square without pressure.
Add and Secure the Cabinet Back
With the cabinet box lying face down, position the back panel so its edges sit flush with the sides and top. This alignment keeps the cabinet square and creates a clean rear surface. Check that the panel’s bottom edge meets the box evenly before fastening it.
For cabinet back installation, apply a thin bead of wood glue along the rear edges of the sides, top, and bottom. Set the panel in place, then drive finish nails or narrow crown staples through the panel and into the frame.
Space fasteners about 6 to 8 inches apart, keeping them centered on each rail and stile. Don’t place them too close to an edge, where they could split the wood.
As you work, measure both diagonals or compare opposite corners with a framing square. If the box shifts, nudge it back into alignment before adding more fasteners.
Continue securing back panel until every edge feels tight and firmly supported. Let the adhesive cure according to its label.
Sand and Finish the Cabinet Box
Once the back is secure and the glue has cured, inspect the cabinet box for proud nails, uneven joints, or glue squeeze-out. Set protruding nails, then scrape hardened glue carefully with a chisel. Don’t rush; small defects stand out after finishing.
- Sand the exterior with 120-grit paper, following the grain and keeping edges crisp.
- Progress to 180-grit, removing scratches from the first pass without rounding corners.
- Vacuum the box, then wipe it with a slightly damp, lint-free cloth to collect remaining dust.
- Test your chosen finish on scrap wood before applying it to the cabinet.
Choose a wood stain if you want to highlight the grain. Apply it evenly with a cloth or brush, allow the recommended soaking time, and wipe away excess.
For solid color, use a compatible primer followed by a durable paint finish. Let each coat dry fully, and lightly sand between coats when the product directions recommend it.
Protect your work area, provide ventilation, and keep dust away while the finish cures.
Add Shelves, Doors, and Hardware
After the finish has cured, install the shelves, doors, and hardware to complete the cabinet. Measure the opening before cutting shelves, allowing a small clearance for easy placement and removal.
Apply edge banding or decorative trim to exposed shelf edges, then secure shelf pins at matching heights. Test each shelf for level and stability.
Mount hinges to the doors first, using a template for consistent spacing. Hold each door in position, attach the hinges to the cabinet, and adjust screws until the gaps look even.
Install pulls or knobs after marking their locations with a guide. Your paint finish can chip if you overtighten hardware, so work carefully.
| Component | Installation tip |
|---|---|
| Shelves | Leave clearance |
| Doors | Align hinges |
| Hardware | Mark carefully |
Open and close every door, checking for rubbing. Tighten fasteners, touch up small marks, and add bumpers to reduce noise.
Confirm the cabinet sits securely before loading it.
Frequently Asked Questions
Can Cabinet Boxes Be Modified Later to Accommodate Plumbing or Electrical Access?
Yes, you can modify cabinet boxes later for plumbing or electrical access, provided you plan carefully. You can cut openings with a hole saw or jigsaw, then protect exposed edges with grommets or sealant.
Check for structural supports, pipes, and wires before cutting. Material flexibility affects how easily you can adapt the box; plywood usually modifies well.
Adjustable shelving can also create clearance for pipes, outlets, or future equipment without major rebuilding or replacement.
How Much Weight Can a Simple Cabinet Box Safely Support?
You can usually expect a simple cabinet box to support 50–100 pounds when you distribute the load evenly and anchor it securely. The shelves, fasteners, back panel, and wall connections determine its true weight capacity.
Material strength matters: plywood generally outperforms particleboard, while thicker panels resist sagging. Before loading, inspect joints and supports.
You shouldn’t store heavy appliances or dense objects unless you reinforce the box and verify every connection first.
Should Cabinet Boxes Be Anchored to Walls for Safety?
Yes, you should anchor cabinet boxes to walls for safety, especially tall, heavy, or freestanding units. Wall anchoring prevents tipping, protects children, and improves Cabinet durability during everyday use.
Locate studs, use suitable screws, and attach through the cabinet’s strongest structural areas. For masonry walls, choose appropriate anchors. Don’t rely on drywall alone.
Wall anchoring matters even more when drawers, doors, or stored items could shift the cabinet’s center of gravity.
What Ventilation Considerations Apply to Cabinets Enclosing Appliances?
You need airflow optimization, not a sealed enclosure, when cabinets surround appliances. Provide clearance around vents, motors, coils, and heat-producing surfaces, and follow each manufacturer’s specifications.
Don’t block intake or exhaust openings with shelves, doors, or stored items. Add ventilation fans when natural circulation can’t remove heat or moisture, directing discharge safely outdoors when required.
Keep electrical components accessible, use heat-resistant materials, and install carbon-monoxide detectors near fuel-burning appliances.
How Can Damaged Cabinet Boxes Be Repaired or Replaced?
You can repair minor cabinet-box damage by tightening joints, replacing loose fasteners, filling dents, and reinforcing split panels with cleats.
For swelling, delamination, or structural failure, remove the damaged section and install a matching replacement box. Prioritize durability by matching the dimensions, joinery, and finish.
Careful material selection, such as using plywood in moisture-prone areas, helps prevent repeat damage. If the box supports heavy appliances, replace it rather than relying on cosmetic repairs.
Conclusion
You’ve now built a sturdy cabinet box from a simple plan, accurate cuts, and careful assembly. As you sand, finish, and add shelves or doors, remember that small details create lasting results.
In the United States, studies suggest nearly 10% of households lack enough storage space. Your simple cabinet box can help make everyday life feel calmer and more organized. How to Build a Simple Cabinet Box
Stand back and enjoy what you’ve made: useful furniture shaped by your own hands, time, and patience.